Just hear those sleigh bells jinglin’, ring ting tinglin’! Behold! Christmas is just around the corner, and it’s time to bring those Christmas decorations out.
A whole lot of being in the ‘Christmas spirit’ is about the way you show it. A lot of people bring out those ugly sweaters. Yeah, you know what I’m talking about! Ugly sweaters are all a part of the Christmas spirit.
But if you want to do something a little more creative this year, why not prettify your nails? A nice way to get into the jolly spirit is fun Christmas nails. Don’t worry if you’re not the best at nail art, we’ve got something in store for everyone! Wear the spirit on your nails, I say!
These Twenty Christmas Nail Designs Will Make Everyone Say ‘Ho Ho Ho’!
1. Christmas Sparkle
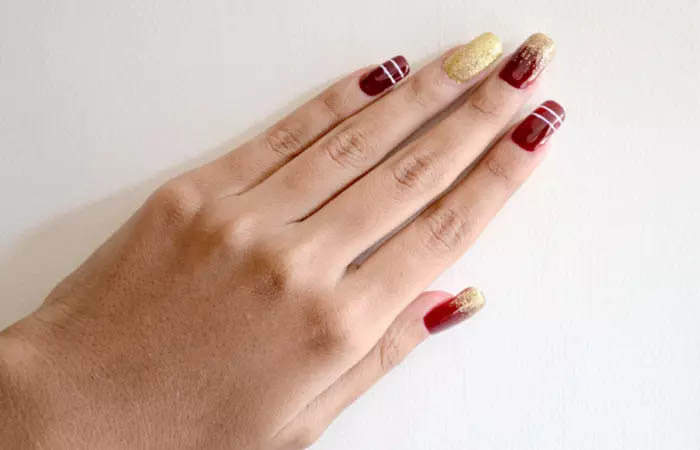
Requirements
- Maroon nail polish
- Golden glitter nail polish
- Makeup sponge
- White nail polish
- Nail art brush
Christmas Sparkle Nail Art Tutorial
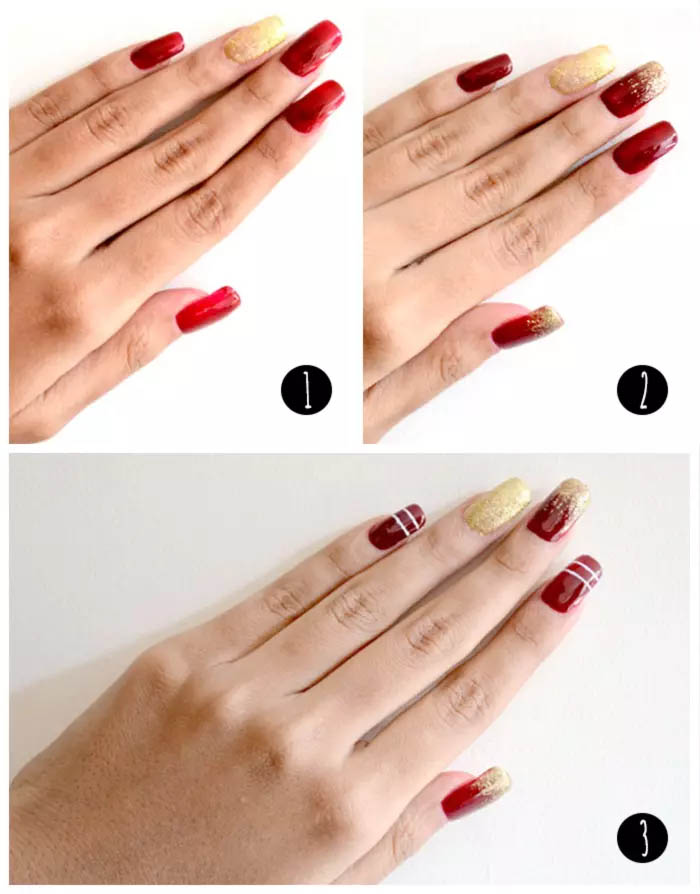
- Apply maroon nail polish to all your nails, except the nail on the ring finger. Make your nail art look exceptional by applying golden glitter nail polish on that nail. The golden nail polish will add more pizzazz to your nail art.
- Give your mani some holiday glitz by applying the golden glitter nail polish on the tips of your nails to create an ombre effect. Apply this glitter on your middle finger and thumb. You can also use a makeup sponge to apply the glitter so that it doesn’t look overdone.
- For the index and little fingers, take a thin nail striper, dip it in white nail paint, and draw two horizontal lines just below the tips of your nails.
- Apply a clear top coat to seal the design.
2. Red And White Christmas Nail Art
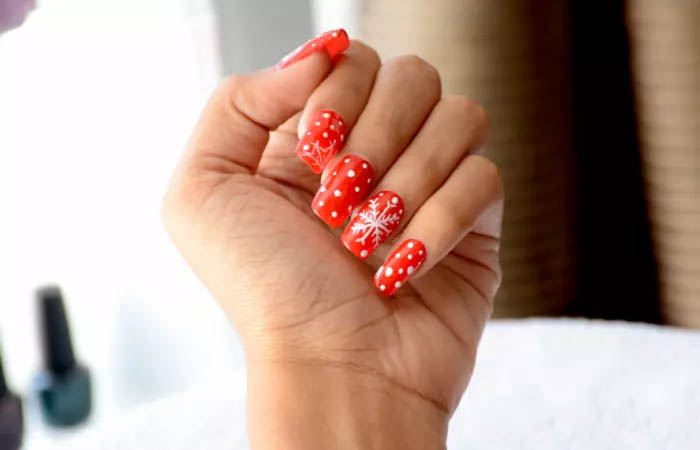
- Red nail polish
- White nail polish
- Nail striper
- Dotting tool
How To Apply Red And White Christmas Nail Art?
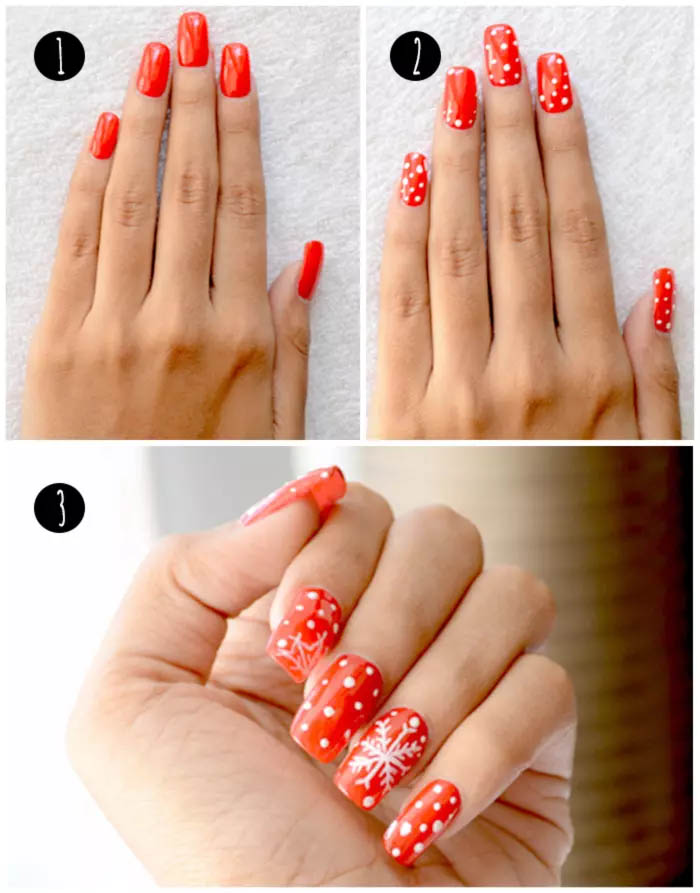
- Apply red nail polish to all of the nails.
- Use a dotting tool to create dots. Leave some space on the index and ring finger as shown.
- With a nail striper, create a snowflake pattern.
- Finish it with a top coat and you’re done!
3. Santa Nail Art
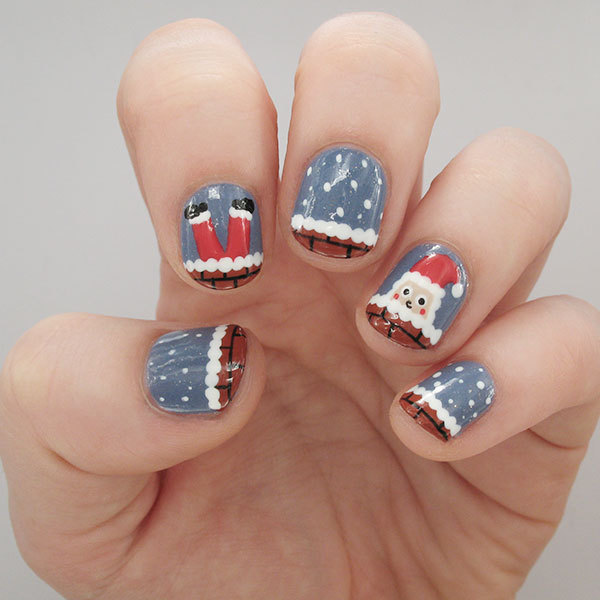
Requirements
- Beige nail polish
- Red nail polish
- White nail polish
- Black nail polish
- Medium sized dotting tool
Santa Nail Art Tutorial
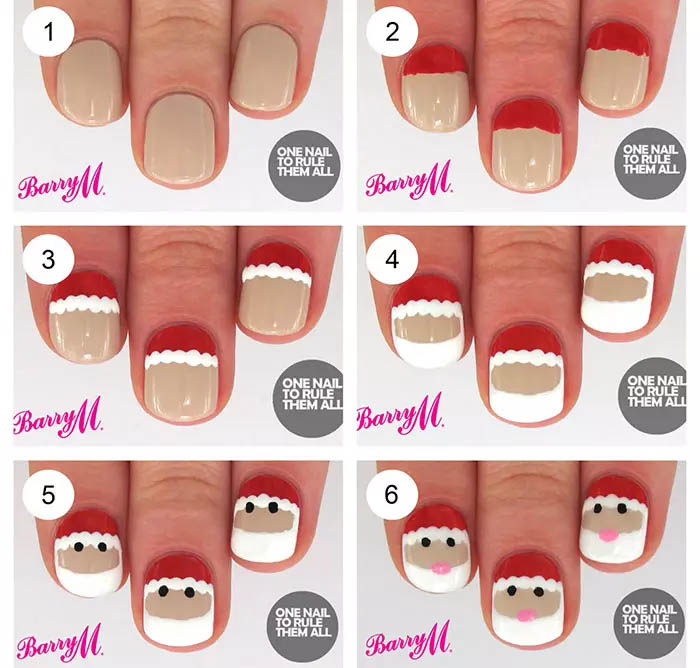
- Paint your entire nails with the beige polish.
- Apply red polish near the cuticle.
- Using a dotting tool, dot the area where the red meets the beige.
- As in a French manicure, apply white polish to the tips.
- Then, using the black and pink polish, make the eyes and nose with a dotting tool.
- Finish with a top coat.
4. Icy Trees Nail Design
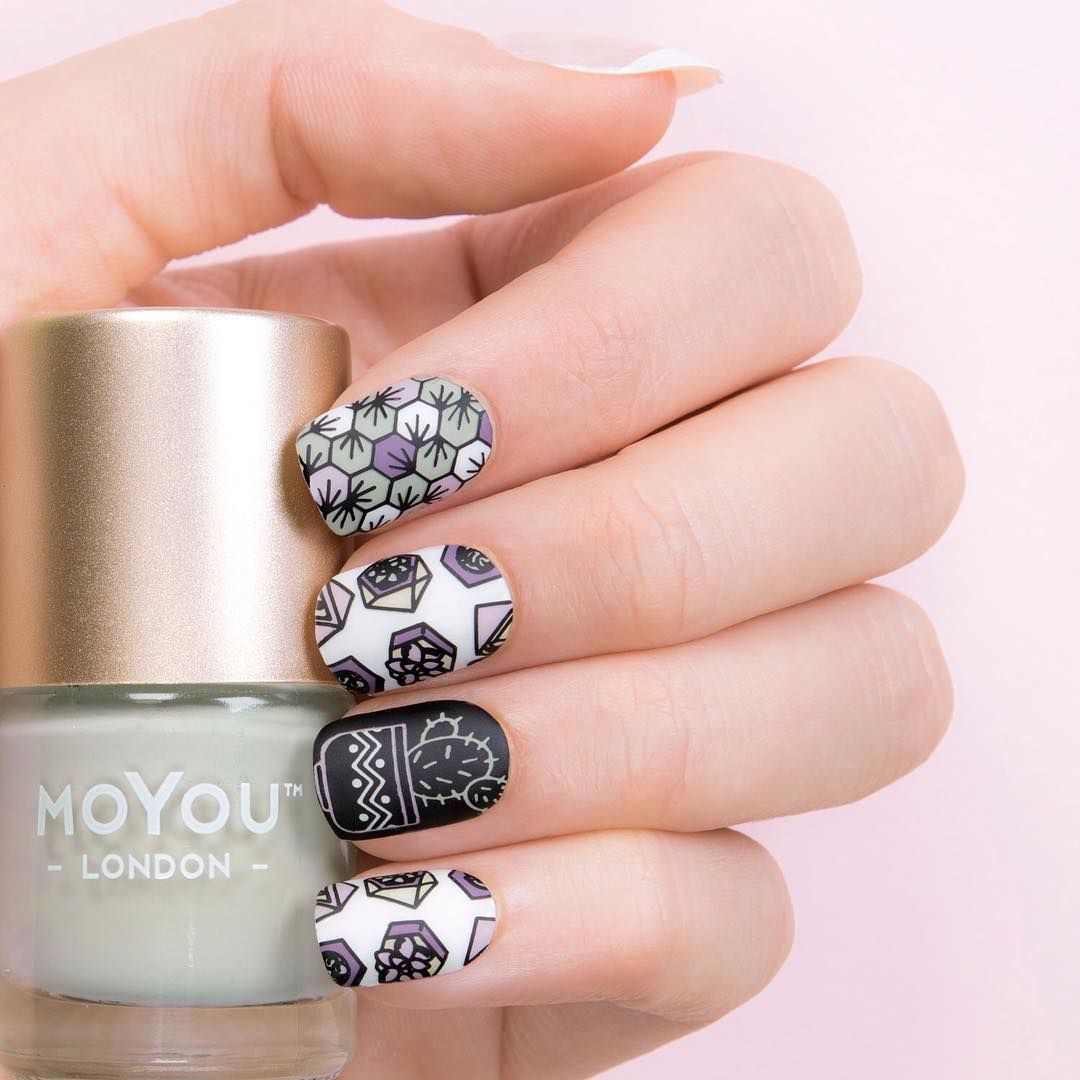
You Will Need
- Pale blue nail polish
- Blue nail polish
- Sponge
- Micro glitter top coat
- White nail polish
- A fine brush for creating the trees
Icy Trees Nail Art Tutorial
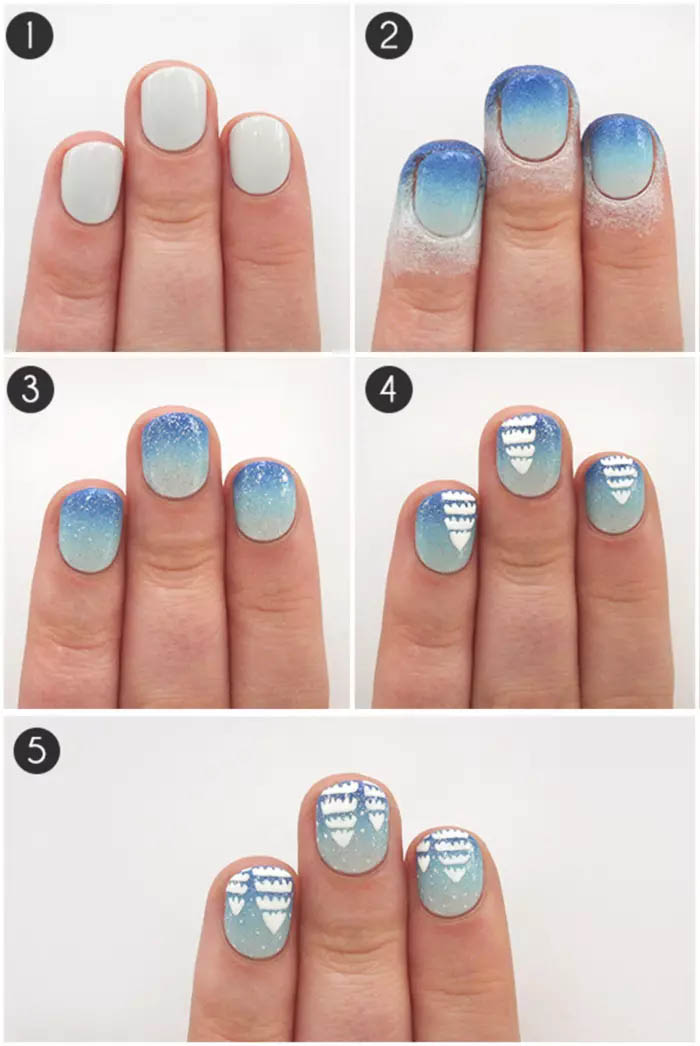
- Use the pale blue shade to paint the entire nail.
- Apply some of the darker blue polish on the sponge and dab it onto the top half of the nail to create an ombre effect.
- Now, apply the glitter top coat to make it look like it is snowing!
- Use tiny strokes with a fine brush to create the snowy trees as shown.
- Finish with a top coat and you’re done!
5. Mistletoed Up!
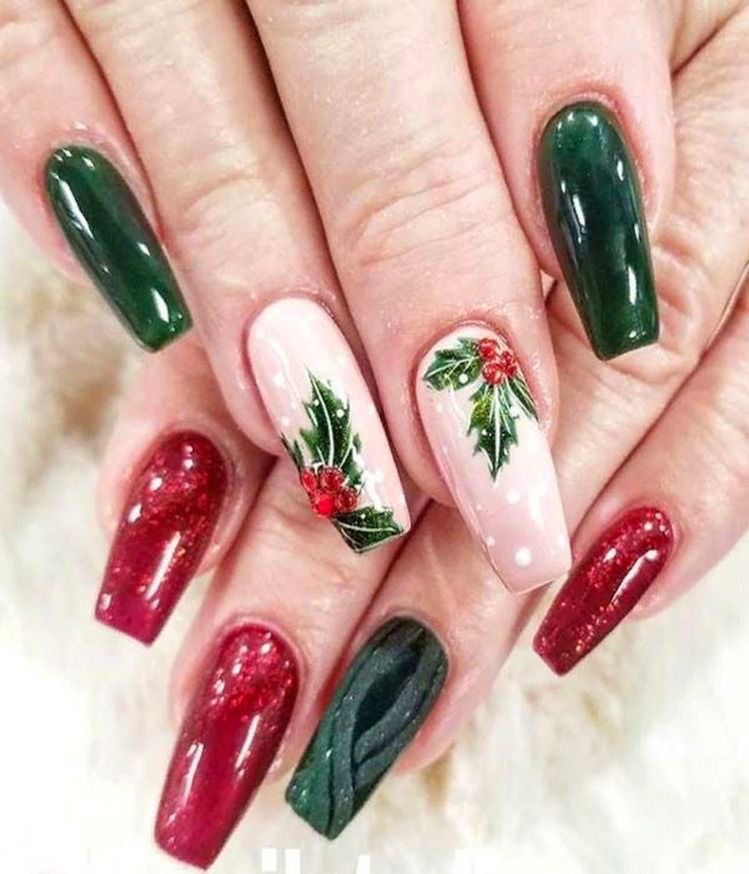
You Will Need
- Green nail polish
- Red nail polish
- White nail polish
- Fine brush
- Dotting tool
Mistletoe Up Nail Art Tutorial
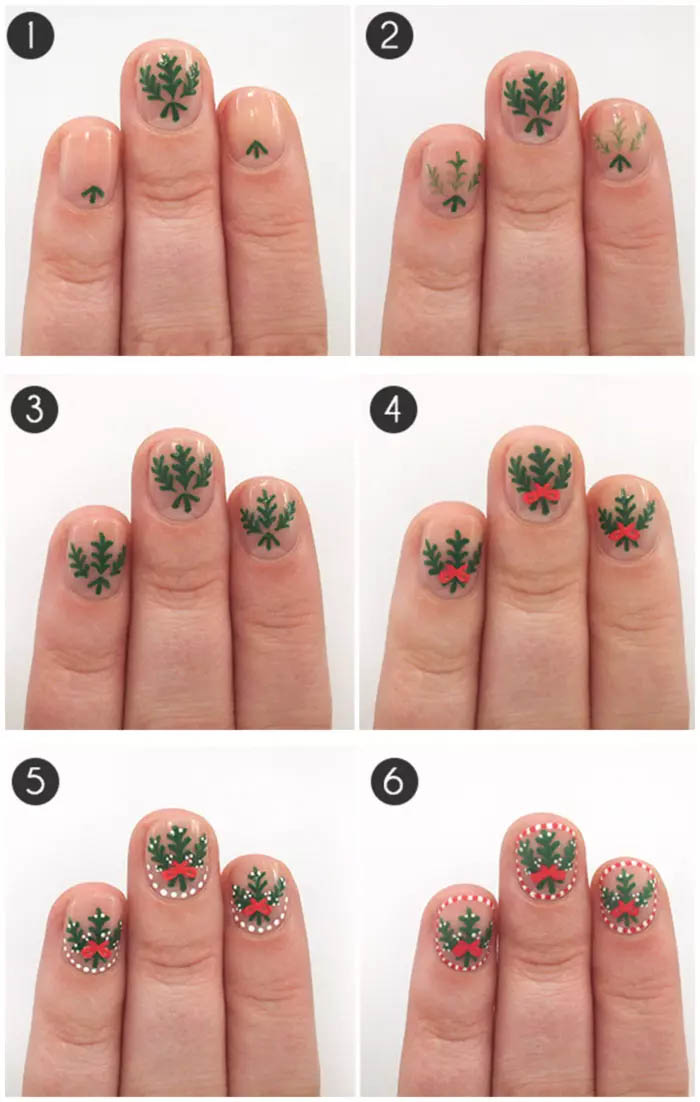
- On clean nails, create the mistletoe as shown with a fine brush. Draw three leaves joining at the bottom.
- Make sure to leave some space for the bow. Draw a bow with white polish, then go over it with the red. Doing so will make the red seem brighter.
- Place tiny dots on the leaves of the mistletoe.
- Create a pattern of red and white dots towards the edge of the nail and seal it with a top coat.
6. Wreath Nail Art
You Will Need
- Beige nail polish
- Green nail polish
- Light green nail polish
- Silver nail polish
- White nail polish
- Red nail polish
- Fine brush
- Dotting tool
How To Apply Wreath Nail Art? – Tutorial
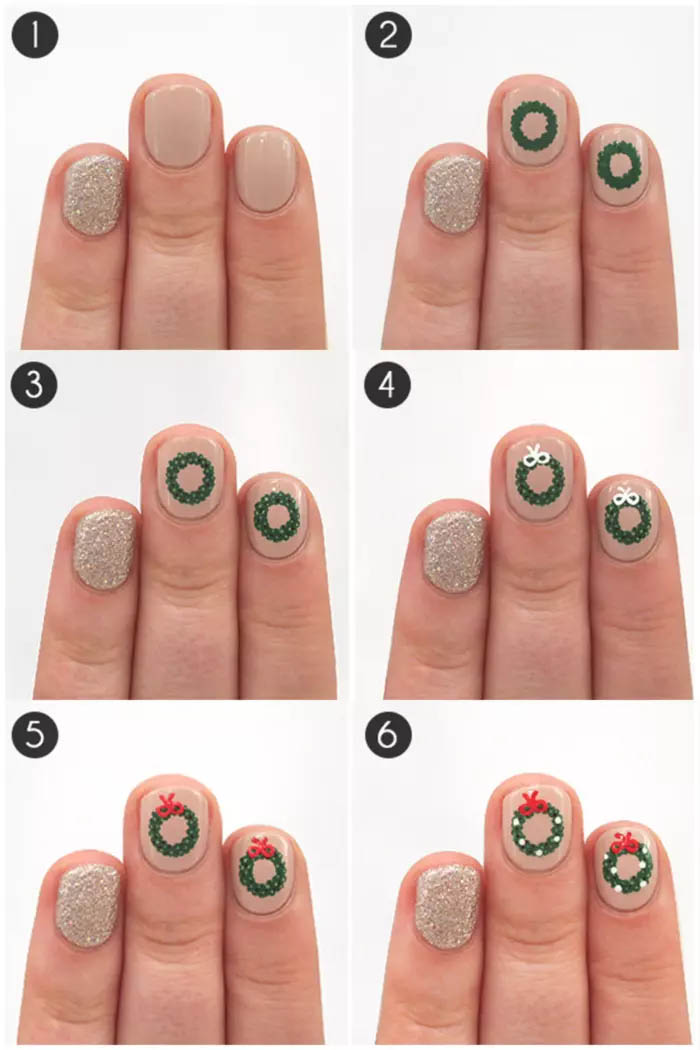
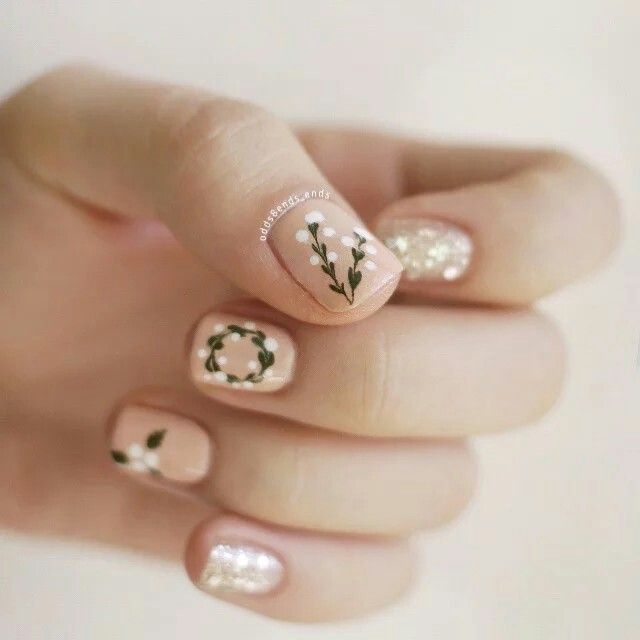
- Paint all the nails beige except for the nail on the ring finger. Make that the accent nail by painting it silver.
- Draw a circle with the green and use a dotting tool to create a wreath-like pattern.
- Using the red and light green shades, create tiny dots with a very small dotting tool. This will give the wreath more texture and detail.
- Create a bow with the white nail polish and go over it with red once it is dry. This will make it look brighter.
- Finally, create small white dots on the wreath to signify snow and seal it all up with a top coat.
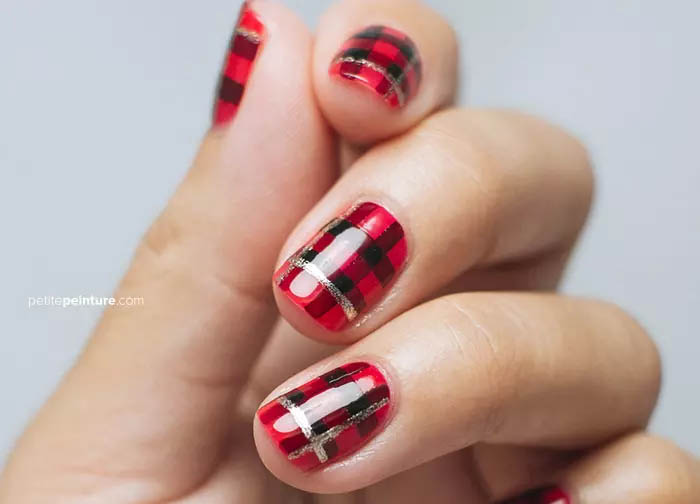
7. A Very Plaid Christmas Nail Art
You Will Need
- Red nail polish
- Deep maroon nail polish
- Gold nail polish
- Nail striper
- Thin strips of tape
A Very Plaid Christmas Nail Art Tutorial
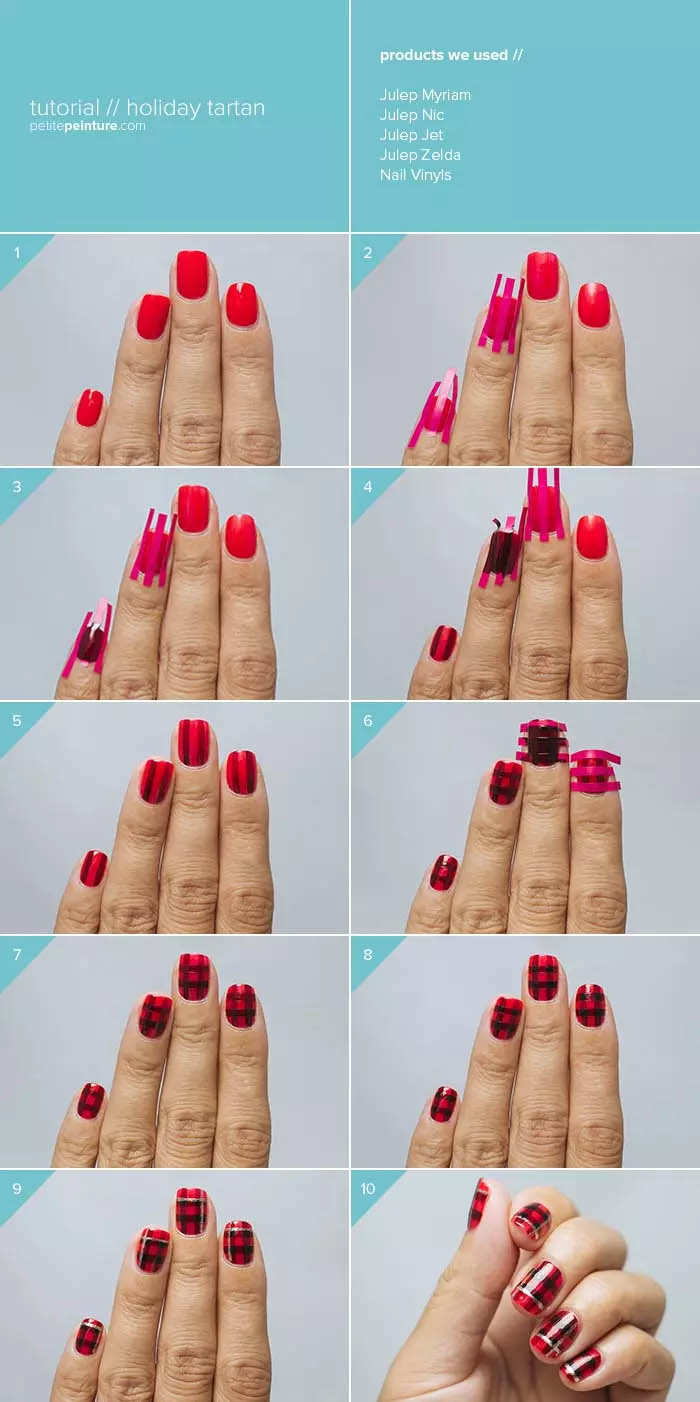
- Paint all your nails red.
- Wait for it to dry before using the strips of tape. Place them vertically on the nails and paint over it with the maroon polish.
- Slowly remove them and place them horizontally now. Paint the maroon over it.
- You should have a pattern that looks like plaid. To add a little something extra, use a nail striper and apply two gold stripes, one vertical and the other horizontal.
- Seal it off with a top coat!


